 Continuing on the last posting, this acticle is about some hack (still in conformity with the underlying OTRS framework) to have the beloved bulk-update dialog link (and functionality) available in the ticket detail view. Why so? Well, to be honest and for the sake of brevity, the bulk-update dialog allows for a multitude of changes applied to a ticket without documenting each and every piece of change with a subject and a body text message. As an example, regard changing the owner and the responsible from within some ticket detail view. It will take two popups and at least four text input fields to be nourished… On the other hand, you may set all this flags like
 Ticket::Frontend::AgentTicketClose###NoteMandatory to get rid of the notes restraint but that is yet another approach.
Ok, however, the bulk-update dialog, by its nature, is a multi-element (ticket) user interface artefact and in such a way only uplinked on pages with, usually, a couple of checkboxes, e.g. the standard OTRS status view. Since the ticket detail view is a single-element artefact, there is no bulk action element in place, why should it.
So, yet again, we walk the path pioneered by the underlying OTRS framework, documented in OTRS developer book and ConfigReference Ticket (search for Ticket::Frontend::MenuModule) as well as to some extend blogged about by the SectorNord people in [((OTRS)) Community Edition] Displaying and hiding menu entries in the ticket view.
First up, we create another ConfigItem entry in /opt/otrs/Kernel/Config/Files/Ticket-Local.xml file, familiar from the last post. Any already existing ConfigItem entry of type Ticket::Frontend::MenuModule from /opt/otrs/Kernel/Config/Files/Ticket.xml may serve as a template.

Using Ticket::Frontend::MenuModule###470-Junk we take the following adaptions to set up the new Ticket::Frontend::MenuModule###010-Bulk. Please note that the name change also serves as a sorting index of the menu items from left to right. 010-Bulk will therefore immediately follow 000-Back as the second menu item.
    <ConfigItem Name="Ticket::Frontend::MenuModule###470-Junk" Required="0" Valid="0">
        <Description Translatable="1">Shows a link to set a ticket as junk in the ticket zoom view of the agent interface. Additional access control to show or not show this link can be done by using Key "Group" and Content like "rw:group1;move_into:group2". To cluster menu items use for Key "ClusterName" and for the Content any name you want to see in the UI. Use "ClusterPriority" to configure the order of a certain cluster within the toolbar.</Description>
        <Group>Ticket</Group>
        <SubGroup>Frontend::Agent::Ticket::MenuModule</SubGroup>
        <Setting>
            <Hash>
                <Item Key="Module">Kernel::Output::HTML::TicketMenu::Generic</Item>
                <Item Key="Name" Translatable="1">Spam</Item>
                <Item Key="Action">AgentTicketMove</Item>
                <Item Key="Description" Translatable="1">Mark this ticket as junk!</Item>
                <Item Key="Link">Action=AgentTicketMove;TicketID=[% Data.TicketID %];DestQueue=Junk</Item>
                <Item Key="Target"></Item>
                <Item Key="PopupType"></Item>
                <Item Key="ClusterName" Translatable="1"></Item>
                <Item Key="ClusterPriority"></Item>
            </Hash>
        </Setting>
    </ConfigItem>
using:
ConfigItem/@Name -> "Ticket::Frontend::MenuModule###010-Bulk"
ConfigItem/@Valid -> "1"
ConfigItem/Setting/Hash/Item/@Key="Action" : AgentTicketBulk
ConfigItem/Setting/Hash/Item/@Key="Description" : Bulk update this ticket
ConfigItem/Setting/Hash/Item/@Key="Link" : Action=AgentTicketBulk;TicketID=[% Data.TicketID | html %];[% Env("ChallengeTokenParam") | html %]
ConfigItem/Setting/Hash/Item/@Key="Name" : Bulk
ConfigItem/Setting/Hash/Item/@Key="PopupType" : TicketAction
mapped:
    <ConfigItem Name="Ticket::Frontend::MenuModule###010-Bulk" Required="0" Valid="1">
        <Description Translatable="1">Shows a link to bulk update a set of common fields in a ticket without a mandatory lock. Additional access control to show or not show this link can be done by using Key "Group" and Content like "rw:group1;move_into:group2". To cluster menu items use for Key "ClusterName" and for the Content any name you want to see in the UI. Use "ClusterPriority" to configure the order of a certain cluster within the toolbar.</Description>
        <Group>Ticket</Group>
        <SubGroup>Frontend::Agent::Ticket::MenuModule</SubGroup>
        <Setting>
            <Hash>
                <Item Key="Module">Kernel::Output::HTML::TicketMenu::Generic</Item>
                <Item Key="Name" Translatable="1">Bulk</Item>
                <Item Key="Action">AgentTicketBulk</Item>
                <Item Key="Description" Translatable="1">Bulk update this ticket</Item>
                <Item Key="Link">Action=AgentTicketBulk;TicketID=[% Data.TicketID | html %];[% Env("ChallengeTokenParam") | html %]</Item>
                <Item Key="Target"></Item>
                <Item Key="PopupType">TicketAction</Item>
                <Item Key="ClusterName" Translatable="1"></Item>
                <Item Key="ClusterPriority"></Item>
            </Hash>
        </Setting>
    </ConfigItem>
Such a way, the resulting url to the bulk-update popup will read something like: https://otrs.some-server.de/otrs/index.pl?Action=AgentTicketBulk;TicketID=43674;ChallengeToken=CcHiHGGowWmfiQeQBNGm6UKjgheTsjCZ und deliver the desired functionality. If you omit the ConfigItem/Setting/Hash/Item/@Key="PopupType" setting, the dialog will not open in a popup but in the parent window.

Different from the behaviour last time, the new user interface element was not immediately visible upon the next click. It took an explicit activation in the OTRS system config (look out for Ticket::Frontend::MenuModule in the group Ticket) like so:
 .
.
Have fun, Peter
 If you happen to find the widgets available for the otrs dashboard, supplied by the default installation, out of line with your in house workflow or just off your needs and taste, here is how to move things further.
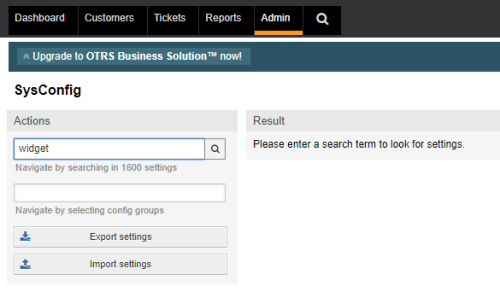


You must be logged in to post a comment.